Illustration 1
Code 2/5 Industrial
Code Codabar
Code 39
Code 93
Code 128
Code EAN 8
Code EAN 13
Code UPC-A
Code Pharmazeutische Zentralnummer (PZN)
Here now a representation and explanation of the program, thought as online-help.
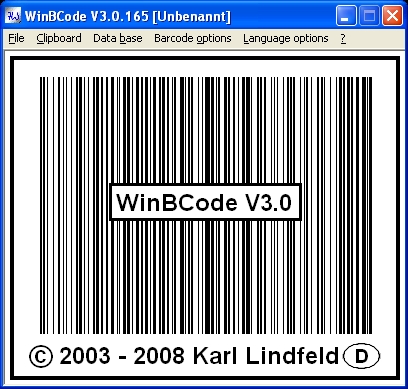
In illustration 1, you see the program directly after the start with "WinBCode.exe" or with "WBCStart.exe."..
Illustration 1
We now goes through the procedure step by step to the preparation, to printing and to the insertion of a bar-code.
Step 1:
Election of the wished bar-code-type.
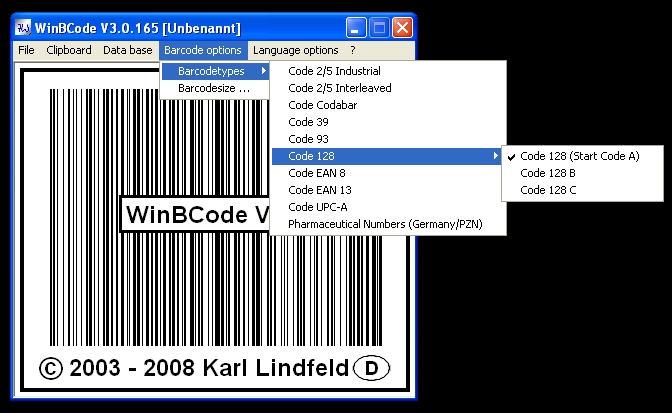
Illustration 2
Step 2:
Construction of a data base and table-connection with the bar-code-text, for
example determined article-numbers...
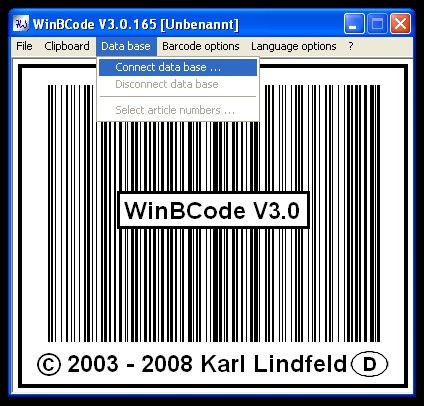
Illustration 3
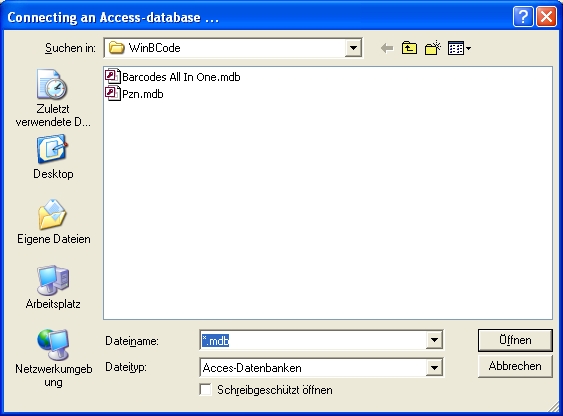
Illustration 4
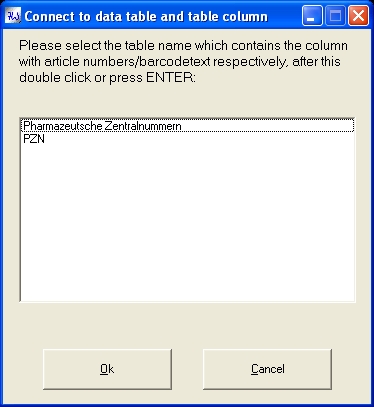
Illustration 5
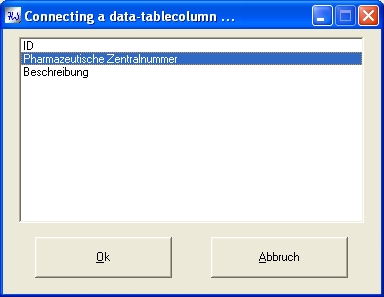
Illustration 6
Schritt 3:
Selection of the bar-code-text, for example from some pharmaceutical
central-numbers...
After clicking the said menu-point, a selection-window appears, in which the
available PZN appear in the left list. We all can these all at once with a click
on">> " into the right list sends, or we mark one single PZN and
send her/it/them with" > " into the right list. The numbers, of
which a bar-code should be produced, are in this after the selection of the PZN.
Furthermore, we can still boast below the two lists, like often from the
selected numbers bar
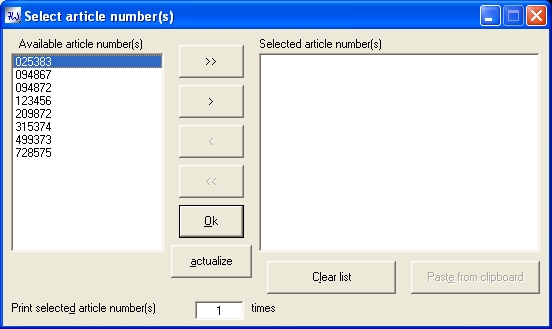
Illustration 7-1
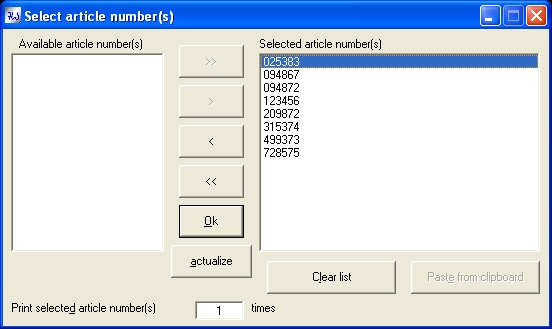
Illustration 7-2
Schritt 4:
After the selection of the numbers, it must still be established, which size the
bar-code on the expression as well as. should have in the preview. We click on
"bar-code-options" to it in the main-menu, afterwards "bar-code-size...".
In the dialogue-window appearing after it - which is lent differently to each
Barcodetyp -, one can input different values according to size of the labels in
the format-presentation. We don't want to change any value this time and want to
click on O.K..
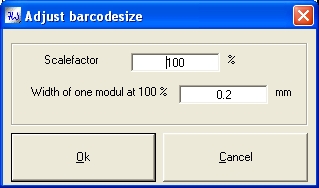
Illustration 8
Schritt 5:
Selection of a format-presentation:
How to see in illustration 9, appears after clicking on "file" in the main-menu and clicking from "co format-presentation connects" a dialogue-window, in which it 4 choices gives. I would not like to do any advertisement for Avery Zweckform labels, I just very frequently use her/it/them and have allowed for me to list three etiquette-types of this company. However, there is the possibility to define own etiquette-presentations and to use each etiquette-paper with it with rectangular labels.

Illustration 9
We choose "self defined the option..." and clicks on "processing...". When first-time starting from WinBCode or after alteration of the printer-configuration, it appears as to see in illustration 10, a window, which shows us, that first finished printer available in the system and the paper-formats supported by them are retrieved. Do available finished printer available in the system, they don't need to be on switched, must her/it however with network-printers or must the Com
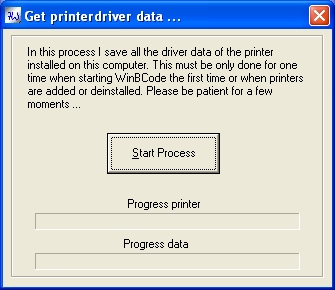
Illustration 10
After the retrieval-process (it becomes only the printer-drivers, interrogated not the printers even) appears like in illustration 11 a dialogue-window...
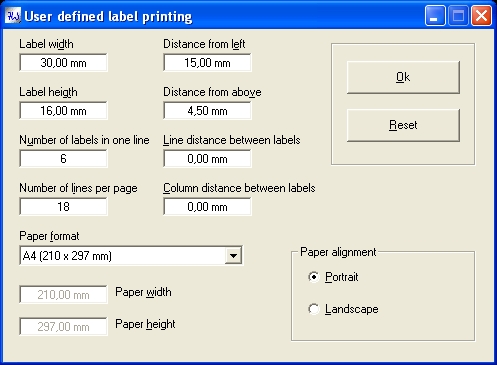
Illustration 11
I think that is clear to each halfway practiced user which function the individual input-fields have.
It still is mentioned that only the formats supported by the currently put in printer are listed in the Drop Down-Liste "paper-quality."
Schritt 6:
Adjust the pressure-edition on a printer...
If your bar-code-print-outs on the paper don't correspond to the measurements of the format-presentation but slipped upward, below, right or left, you can adjust the pressure-edition with this function. Pick "file" the menu-point "printers in the menu adjusts." The dialogue-window shown in illustration 12 appears...
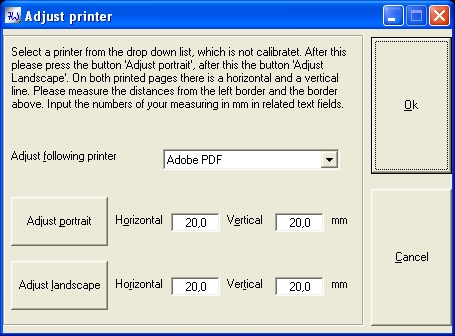
Illustration 12
Schritt 7:
Pressures and preview of the bar-code of the labels...
Click on "file" in the menu-strip of WinBCode, then in the Pull Down menu on "pressures." You/they see to see a dialogue-window like in illustration 13...
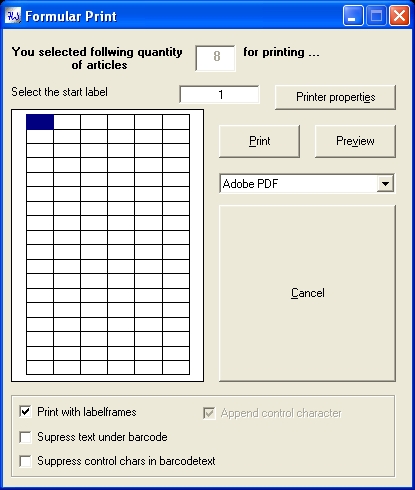
Illustration 13
Step 8:
Preview
Before you perform an expression on paper, you first should click on the function "Preview" in any case in order to see whether the size of the bar-code fits (to it the Checkbox "Mit etiquette-frameworks prints" activates) into the label and whether the format-presentation was input right. You save etiquette-bows, that would be printed otherwise deficiently, through it conceivably.
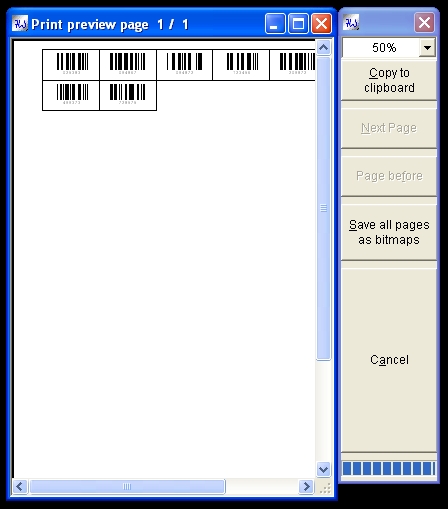
Illustration 14
Schritt 9:
Drucken
Schritt 10:
Registrierung ...
You/they can try out the program for 30 days. If it promises you, and you would like to use it fully, you can and not must let yourself register. Click on the question mark to it in the main-menu-strip of WinBCode. Choose "registering." The registration-form appears to see in illustration 15 like here...
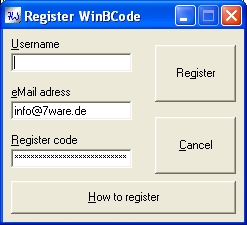
Illustration 15
Then click on "registration-code orders." In the as a result
appearing news, sees illustration 16, my email-address as well as my
account-data stand. Transfer me the amount of 10 - Eur (The 10 Euro Price is
only for rich people) only and I send you a
license-file at your email-address boasted in the remittance. This is to be
copied into the program-table. Don't forget to register also your email-address
and your user-name (case sensitive) into the fields intended for it.
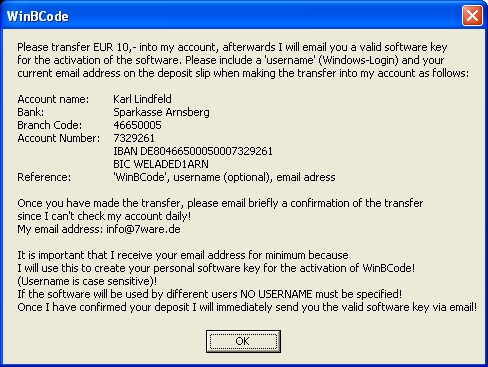
Illustration 16
If you now want to download WinBCode, you click on the Link standing under me...